Authentication Overview
Authentication is used within the Payload Admin panel itself as well as throughout your app(s) themselves however you determine necessary.
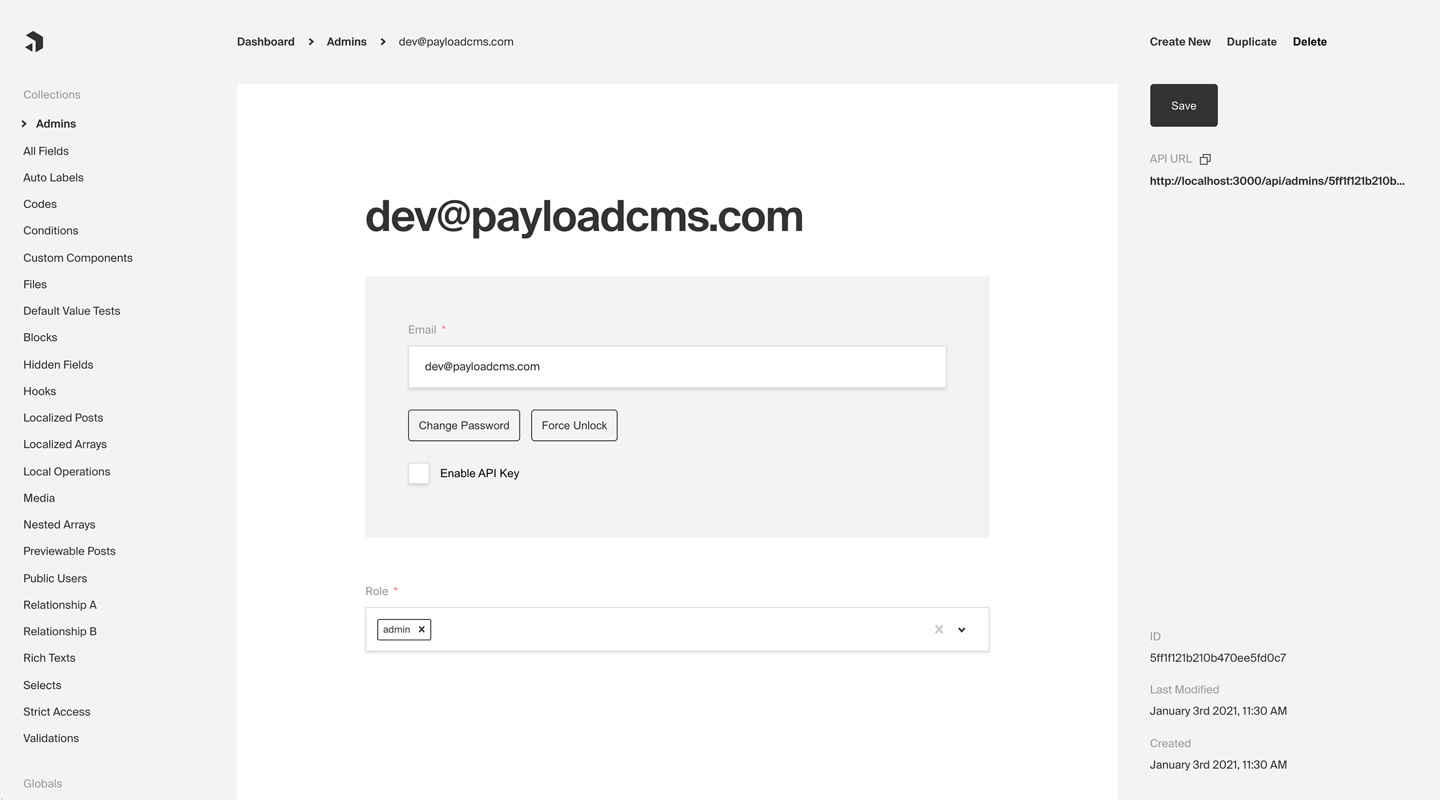 Admin panel screenshot depicting an Admins Collection with Auth enabled
Here are some common use cases of Authentication outside of Payload's dashboard itself:
- Customer accounts for an ecommerce app
- Customer accounts for a SaaS product
- P2P app or social site where users need to log in and manage their profiles
- Online game where players need to track their progress over time
By default, Payload provides you with a User collection that supports Authentication, which is used to access the Admin panel. But, you can add support to one or many Collections of your own. For more information on how to customize, override, or remove the default User collection, click here.
Enabling Auth on a collection
Every Payload Collection can opt-in to supporting Authentication by specifying the auth property on the Collection's config to either true or to an object containing auth options.
For a full list of all auth options, click here.
Simple example collection:
By enabling Authentication on a config, the following modifications will automatically be made to your Collection:
emailas well as passwordsalt&hashfields will be added to your Collection's schema- The Admin panel will feature a new set of corresponding UI to allow for changing password and editing email
- A new set of
operationswill be exposed via Payload's REST, Local, and GraphQL APIs
Once enabled, each document that is created within the Collection can be thought of as a user - who can make use of commonly required authentication functions such as logging in / out, resetting their password, and more.
Logging in / out, resetting password, etc.
Click here for a list of all automatically-enabled Auth operations, including login, logout, refresh, and others.
Token-based auth
Successfully logging in returns a JWT (JSON web token) which is how a user will identify themselves to Payload. By providing this JWT via either an HTTP-only cookie or an Authorization: JWT or Authorization: Bearer header, Payload will automatically identify the user and add its user JWT data to the Express req, which is available throughout Payload including within access control, hooks, and more.
You can specify what data gets encoded to the JWT token by setting saveToJWT to true in your auth collection fields. If you wish to use a different key other than the field name, you can provide it to saveToJWT as a string. It is also possible to use saveToJWT on fields that are nested in inside groups and tabs. If a group has a saveToJWT set it will include the object with all sub-fields in the token. You can set saveToJWT: false for any fields you wish to omit. If a field inside a group has saveToJWT set, but the group does not, the field will be included at the top level of the token.
HTTP-only cookies
Payload login, logout, and refresh operations make use of HTTP-only cookies for authentication purposes. HTTP-only cookies are a highly secure method of storing identifiable data on a user's device so that Payload can automatically recognize a returning user until their cookie expires. They are totally protected from common XSS attacks and cannot be read at all via JavaScript in the browser.
Automatic browser inclusion
Modern browsers automatically include http-only cookies when making requests directly to URLs—meaning that if you are running your API on http://example.com, and you have logged in and visit http://example.com/test-page, your browser will automatically include the Payload authentication cookie for you.
Using Fetch or other HTTP APIs
However, if you use fetch or similar APIs to retrieve Payload resources from its REST or GraphQL API, you need to specify to include credentials (cookies).
Fetch example, including credentials:
For more about how to automatically include cookies in requests from your app to your Payload API, click here.
CSRF Protection
CSRF (cross-site request forgery) attacks are common and dangerous. By using an HTTP-only cookie, Payload removes many XSS vulnerabilities, however, CSRF attacks can still be possible.
For example, let's say you have a very popular app running at coolsite.com. This app allows users to manage finances and send / receive money. As Payload is using HTTP-only cookies, that means that browsers automatically will include cookies when sending requests to your domain - no matter what page created the request.
So, if a user of coolsite.com is logged in and just browsing around on the internet, they might stumble onto a page with bad intentions. That bad page might automatically make requests to all sorts of sites to see if they can find one that they can log into - and coolsite.com might be on their list. If your user was logged in while they visited that evil site, the attacker could do whatever they wanted as if they were your coolsite.com user by just sending requests to the coolsite API (which would automatically include the auth cookie). They could send themselves a bunch of money from your user's account, change the user's password, etc. This is what a CSRF attack is.
To define domains that should allow users to identify themselves via the Payload HTTP-only cookie, use the csrf option on the base Payload config to whitelist domains that you trust.
payload.config.ts:
Identifying users via the Authorization Header
In addition to authenticating via an HTTP-only cookie, you can also identify users via the Authorization header on an HTTP request.
Example:
You can retrieve a user's token via the response to login, refresh, and me auth operations.