

Unlike other headless CMS platforms, Payload offers reusable authentication, saving you time and eliminating the need for separate providers.
Payload offers a highly customizable authentication pattern that you can use directly in your own applications. It works with native apps, web apps, Next.js, and anywhere else you could imagine.
All of your authentication operations like login, logout, forgot password will be ready to use so you won't have to build anything from scratch. These operations are available through the REST API, GraphQL, and within Node itself.
By adopting Payload's authentication features, you and your team can move more quickly and work with easy-to-manage, reusable, and clean code.
In this blog post, we'll go through a sample project that uses Payload's authentication with Next.js, discuss how it works, and explore some additional options you can use for your own applications.
Sample Project: Payload Authentication with Next.js
To log a user in, we just have a simple form that fires a fetch request on submit. The request that we're sending looks like this:
- The request sends a
POSTrequest to the API. - The
credentials: "include"property refers to cookies, authorization headers, and TLS client certificates. - In the body, we're passing a value for email and password.
If the request is unsuccessful, it will be caught with the surrounding try-catch.
Upon logging in, if you look into the response headers, you’ll notice the Set-Cookie header delivered by Payload.
After a user logs in successfully, Payload generates a unique JSON Web Token (JWT) and saves that value as an HTTP-only cookie. Your browser will store that cookie and continue to use it until it expires. HTTP-only cookies are highly secure and cannot be accessed via the browser, making them completely protected from common XSS attacks.
To authenticate the logged-in user, all you have to do is ensure your requests include the cookie that Payload has set for you. By including the credentials: "include" property on all your fetches, the token will be passed back to Payload in the Cookie header of each request. Payload then parses the cookie, checks the token, and will respond accordingly.
Example: Fetching User Data
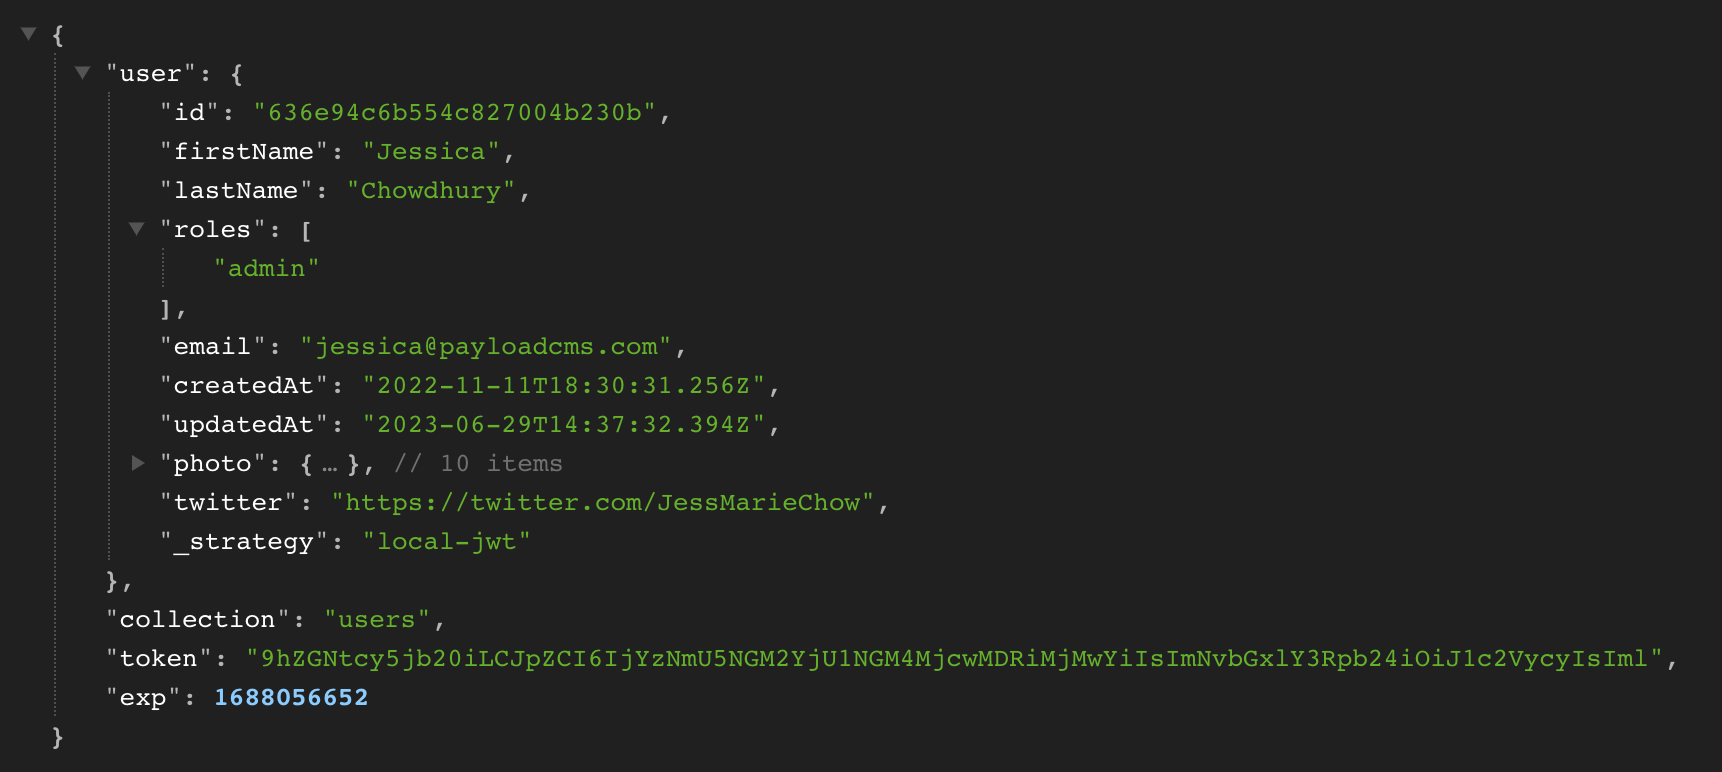
In this example, let's make a fetch request to retrieve the current user's data, this time from the /api/{user-collection}/me endpoint.
By including credentials: "include" , the Payload token will automatically be passed in the Cookie header, allowing Payload to identify the user.
If we go into the request headers in our example project, we see that our cookie has been included, and as a result, our response was successful and we can see all of the data on our user.
Logging Out
To log a user out, simply send a POST request to api/{users-collection}/logout. Payload will then remove the cookie on the current user, and as a result, the user will no longer be authorized.
Alternative Authorization Strategies: API Keys
While using a JWT with HTTP-only cookies is the default authorization strategy for Payload, you can easily integrate different strategies based on specific requirements. One such strategy is using API keys.
API keys can be particularly useful when integrating third-party services that need the ability to identify a specific user. With cookies, you would need to log in each time, retrieve the JWT, and then pass that to your third-party service. With API keys, you can generate a non-expiring key that is unique to each user and can be used to authorize them.
Although technically both methods work for a third-party integration, the API key method is much simpler because it reduces the amount of work that you need to do and works seamlessly with existing auth operations.
API keys will be generated on a user-by-user basis. It's important to know they are meant to represent just a single user. You can pass the API key as an authorization header in your requests, and Payload will be able to authorize the user associated with that key:
Additional Authentication Options
Apart from API keys, Payload offers some other useful authentication options, such as:
lockTime: Duration of user lock after multiple failed attempts.maxLoginAttempts: Maximum number of failed login attempts before locking the user.tokenExpiry: Duration of token validity.- Custom emails for resetting passwords and verifying users.
Moreover, all of the authentication is fully extensible, meaning if you can build it, you can integrate it.
Learn More
You can find the sample project used in this post in the Payload repo, under examples. To learn more about authentication with Payload, you can refer to the Payload documentation.
We hope this guide helps you to build more secure and efficient applications using Payload's authentication capabilities. Happy coding!
